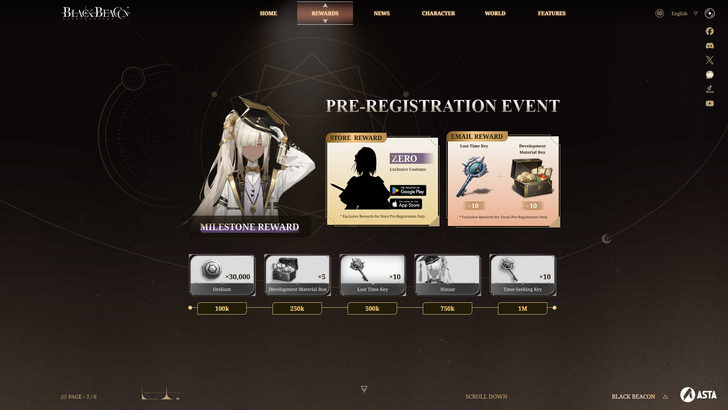
Black Beacon Pre-Register and Pre-Order
Author : Alexis
Feb 26,2025
Unlock the Power of Google Chrome's Built-in Translation: A Step-by-Step Guide
This guide provides a simple walkthrough on how to use Google Chrome's translation features to effortlessly navigate multilingual websites. We'll cover translating entire web pages, selected text, and customizing your translation settings.
Step 1: Accessing the Settings Menu
Locate and click the three vertical dots (More) icon in the upper right-hand corner of your Google Chrome browser. This opens the main settings menu.

Step 2: Navigating to Browser Settings
In the dropdown menu, select "Settings." This will take you to your browser's settings page.

Step 3: Locating Translation Settings
At the top of the settings page, you'll find a search bar. Enter "Translate" or "Language" to quickly find the relevant settings.
Step 4: Accessing Language Settings
Once you've located the translation settings, click on the "Languages" or "Translation" option.
Step 5: Managing Languages
This section allows you to add, remove, or rearrange languages. You'll see a dropdown menu listing supported languages, along with an "Add languages" option.
Step 6: Enabling Automatic Translation
Crucially, ensure the option "Offer to translate pages that aren't in a language you read" is enabled. This ensures Chrome will automatically prompt you to translate pages written in languages other than your default.
By following these steps, you'll unlock Google Chrome's powerful translation capabilities, making your web browsing experience seamless and efficient, regardless of language.
Latest Articles
Gameplay of EA's New The Sims 'Concept' Appears to Leak Online, and It's Not Going Down Well With Fans
A video allegedly showing the next iteration of The Sims has surfaced online, sparking concern among fans about what it could mean for the beloved franchise.
Project Rene — a codename sometimes used interchangeably with The Sims 5, though EA insists

Wuthering Waves Debuts 5-Star Heroes in Update 2.1
Key Points SummaryPhoebe and Brant have been officially confirmed as the upcoming 5-Star Rinascita characters in Wuthering Waves Version 2.1.Lore and in-game appearances suggest Phoebe is likely a Spectro unit, while Brant is expected to wield a swor
Invincible Cast at IGN Live 2025: Killer Instinct, Authenticity, 3v3 Tag
One of the major announcements from the Xbox Showcase was the reveal of 'Invincible VS,' and we sat down with Skybound's Quarter Up studio team at IGN Live to discuss why this 3v3 tag fighter is the perfect adaptation for Robert Kirkman's superhero s

Matchcreek Motors Crafts Custom Cars Using Match-3 Gameplay
After developing multiple popular mobile racing games, Hutch Games is back with a unique twist. This time, they're introducing a puzzle element. Fear not, racing enthusiasts—they haven't strayed far from their roots. Automobiles and racing remain at

Acecraft: Sky Hero Launches with Tom & Jerry Crossover
Developed by Vizta Games, Acecraft: Sky Hero is now available on Android devices. This mobile shooter combines retro arcade action with roguelike elements, featuring an exciting Tom and Jerry crossover event available at launch.Gameplay OverviewAs sk
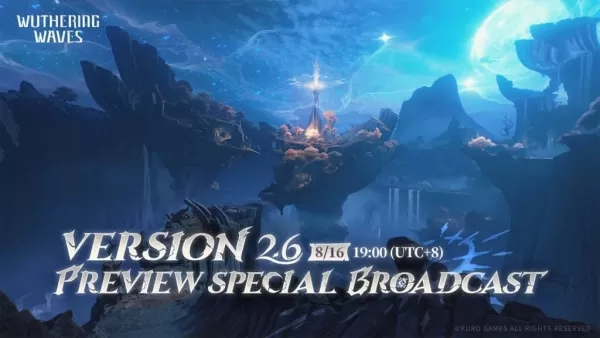
Wuthering Waves Unveils Version 2.6 ‘By Sun’s Scourge, By Moon’s Revelation’
Kuro Games has shared an exclusive look at the upcoming Wuthering Waves Version 2.6 during the Preview Special Broadcast. Titled *By Sun’s Scourge, By Moon’s Revelation*, the update will launch on all platforms on August 28th.
Wuthering Waves Vers
Latest Games


Carrom Meta
Sports丨56.3 MB

Grau de Rua
Simulation丨290.2 MB


Gomu Huyền Thoại - Đại Chiến
Strategy丨665.6 MB


Gabbys DollHouse Tiles Hop
Music丨66.80M

H NTR Chronicles
Casual丨364.40M

Trending Games
MORE +


Top News
MORE +

01
01-01
Call of Duty: Black Ops 6 Adds Fan-Favorite Modes
Call of Duty: Black Ops 6 receives classic game modes and map updates this week, addressing post-launch issues. The highly anticipated "Infected" mode arrives tomorrow, followed by the iconic "Nuketown" map on Friday, November 1st.
Infected and Nuketown Enhance Black Ops 6
Treyarch, the developer,
02
03-13
Top 10 LitRPG Books for 2025
Reading is my absolute favorite pastime. While I enjoy video games and TV, nothing quite compares to immersing myself in a captivating book series. My reading journey began with Harry Potter, branching out to sci-fi, fantasy, mysteries, and even some non-fiction. But my true literary passion ignite
03
04-08
Kingshot Beginner's Guide: Mastering Tower Defense Mechanics
Dive into the thrilling world of Kingshot, a multiplayer strategy game that masterfully combines precision shooting with tactical warfare. Set against the backdrop of a medieval fantasy realm, you step into the shoes of a powerful monarch, locked in a fierce struggle for supremacy over rival kingdom
04
03-05
Helldivers 2: Superstore Rotation (All Armor & Items)
Helldivers 2 Superstore: A Complete Guide to Armor and Item Rotations
Equipping the right armor is crucial in Helldivers 2. With diverse armor types (light, medium, heavy), unique passives, and varying stats, choosing your gear is a strategic decision. The Superstore offers exclusive armor sets an
05
04-16
Azure Latch Codes (March 2025)
Last updated on March 28, 2025 - Added new Azure Latch codes!Are you looking to boost your in-game cash to splurge on animations, styles, emotes, and more in Azure Latch? Look no further. Here, you'll discover all the latest working codes for the game. Don't delay—redeem them quickly and enjoy that
Topics
More +