Enable SSH on Steam Deck: A Guide
Author : Nicholas
Apr 20,2025
Quick Links
The Steam Deck is a powerhouse of versatility, catering not only to gamers but also to users seeking a portable PC experience. With its desktop mode, the Steam Deck opens up a world of possibilities beyond gaming, including the ability to remotely access its internal storage. This functionality is crucial for users who need to manage files from afar.
Running on a Linux-based system, the Steam Deck supports Secure Shell (SSH), a protocol designed for secure remote access. Despite its utility, many Steam Deck users are unaware of how to activate and utilize SSH. This comprehensive guide will walk you through the process of enabling and using SSH on your Steam Deck, ensuring you can leverage this feature to its full potential.
Steps For Enabling SSH On The Steam Deck
 Enabling SSH on your Steam Deck is straightforward. Just follow these steps:
- Power on your Steam Deck.
- Press the Steam button.
- Navigate to Settings > System > System Settings > Enable Developer Mode.
- Press the Steam button again.
- Select Power > Switch to Desktop Mode.
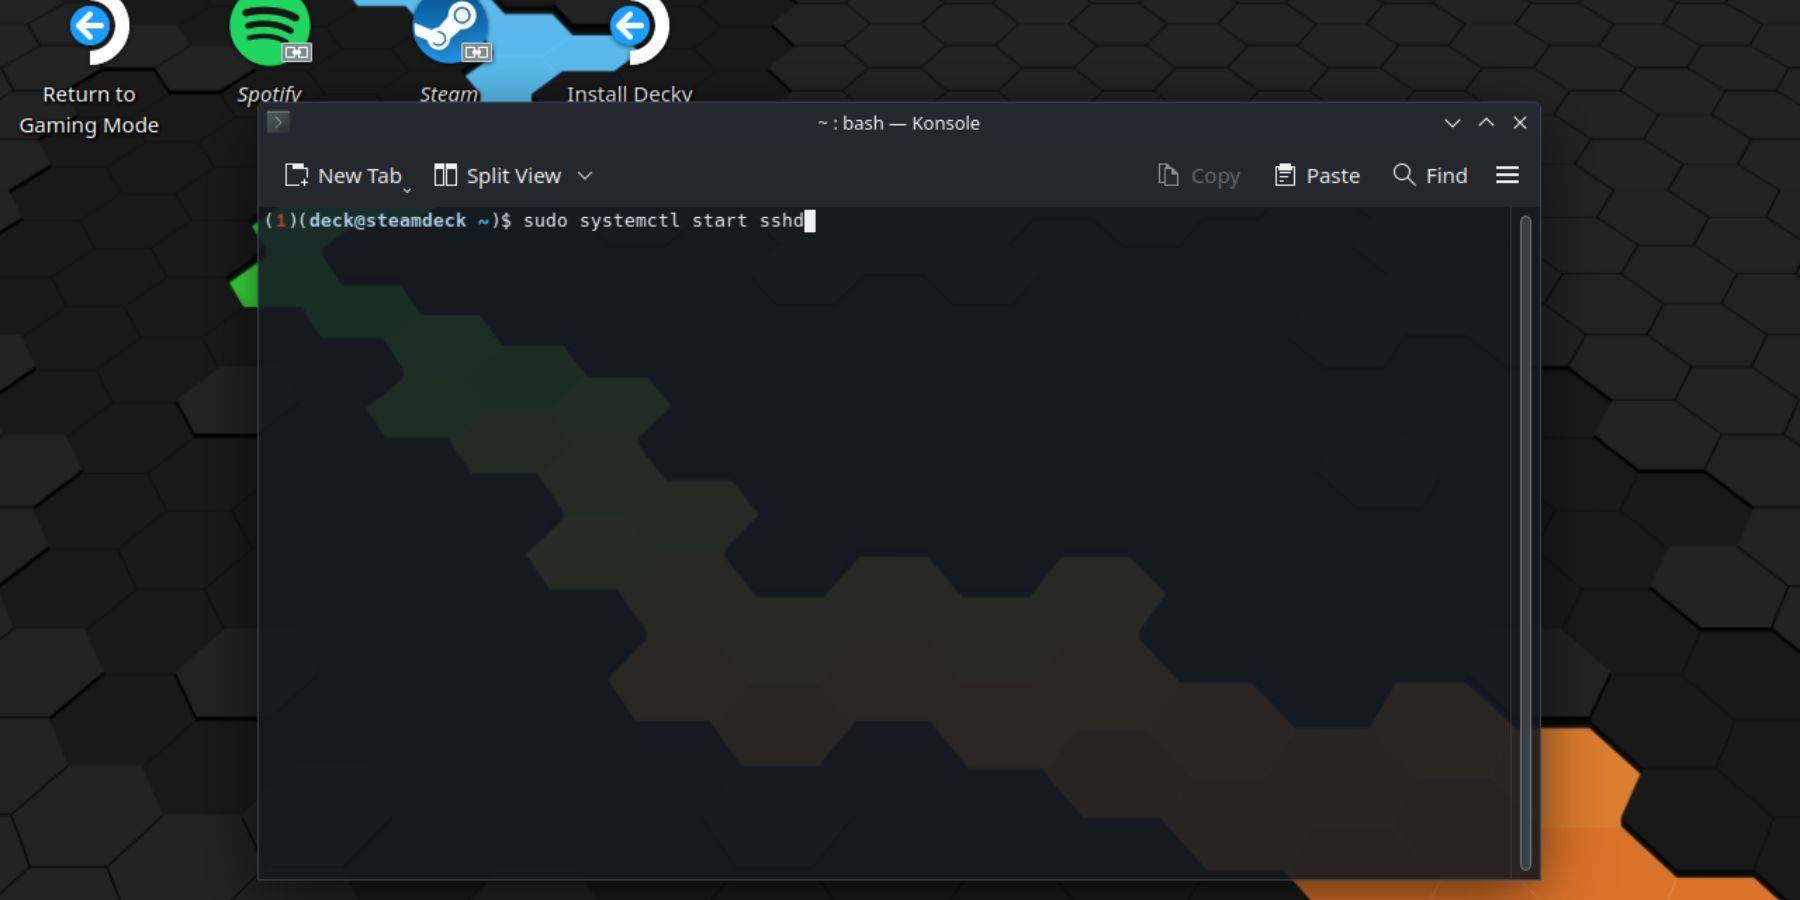
- Open the Konsole from the Start menu.
- Set a password if you haven't already by entering the command:
passwd. Follow the prompts to set your password. - Enable SSH by entering the following command:
sudo systemctl start sshd. To ensure SSH starts after reboots, enter:sudo systemctl enable sshd. - Once SSH is enabled, you can access your Steam Deck's data remotely using any compatible third-party client.
Important: Be cautious not to delete or move system files, as this can lead to OS corruption.
How To Disable SSH On The Steam Deck
If you need to disable SSH on your Steam Deck, here's how:
- Open the Konsole from the Start menu.
- Disable SSH with the command:
sudo systemctl disable sshd. To stop SSH immediately, use:sudo systemctl stop sshd.
How To Use SSH To Connect To The Steam Deck
 With SSH enabled, you can now remotely access your Steam Deck's data. One convenient method involves using a third-party application like Warpinator. Install Warpinator on both your Steam Deck and your PC, and run them at the same time. Transferring data then becomes a breeze.
For Linux PC users, there's no need for additional software. Simply open your file manager and type sftp://deck@steamdeck into the address bar. Enter the password you set earlier, and you're connected.

Latest Articles
Gameplay of EA's New The Sims 'Concept' Appears to Leak Online, and It's Not Going Down Well With Fans
A video allegedly showing the next iteration of The Sims has surfaced online, sparking concern among fans about what it could mean for the beloved franchise.
Project Rene — a codename sometimes used interchangeably with The Sims 5, though EA insists

Wuthering Waves Debuts 5-Star Heroes in Update 2.1
Key Points SummaryPhoebe and Brant have been officially confirmed as the upcoming 5-Star Rinascita characters in Wuthering Waves Version 2.1.Lore and in-game appearances suggest Phoebe is likely a Spectro unit, while Brant is expected to wield a swor
Invincible Cast at IGN Live 2025: Killer Instinct, Authenticity, 3v3 Tag
One of the major announcements from the Xbox Showcase was the reveal of 'Invincible VS,' and we sat down with Skybound's Quarter Up studio team at IGN Live to discuss why this 3v3 tag fighter is the perfect adaptation for Robert Kirkman's superhero s

Matchcreek Motors Crafts Custom Cars Using Match-3 Gameplay
After developing multiple popular mobile racing games, Hutch Games is back with a unique twist. This time, they're introducing a puzzle element. Fear not, racing enthusiasts—they haven't strayed far from their roots. Automobiles and racing remain at

Acecraft: Sky Hero Launches with Tom & Jerry Crossover
Developed by Vizta Games, Acecraft: Sky Hero is now available on Android devices. This mobile shooter combines retro arcade action with roguelike elements, featuring an exciting Tom and Jerry crossover event available at launch.Gameplay OverviewAs sk

Wuthering Waves Unveils Version 2.6 ‘By Sun’s Scourge, By Moon’s Revelation’
Kuro Games has shared an exclusive look at the upcoming Wuthering Waves Version 2.6 during the Preview Special Broadcast. Titled *By Sun’s Scourge, By Moon’s Revelation*, the update will launch on all platforms on August 28th.
Wuthering Waves Vers
Latest Games


Gabbys DollHouse Tiles Hop
Music丨66.80M

H NTR Chronicles
Casual丨364.40M


Tailspin (EP1) - Ginger's Escape
Card丨229.00M

![[18+] Starlewd Valley:Re!](https://img.xc122.com/uploads/37/173149215167347937c925c.jpg)
[18+] Starlewd Valley:Re!
Casual丨147.90M

Bau Cua - Bầu Cua Tôm Cá
Card丨17.80M

Vô Cực Đại Chiến
Card丨22.60M
Trending Games
MORE +


Top News
MORE +


01
01-01
Call of Duty: Black Ops 6 Adds Fan-Favorite Modes
Call of Duty: Black Ops 6 receives classic game modes and map updates this week, addressing post-launch issues. The highly anticipated "Infected" mode arrives tomorrow, followed by the iconic "Nuketown" map on Friday, November 1st.
Infected and Nuketown Enhance Black Ops 6
Treyarch, the developer,
02
03-13
Top 10 LitRPG Books for 2025
Reading is my absolute favorite pastime. While I enjoy video games and TV, nothing quite compares to immersing myself in a captivating book series. My reading journey began with Harry Potter, branching out to sci-fi, fantasy, mysteries, and even some non-fiction. But my true literary passion ignite
03
04-08
Kingshot Beginner's Guide: Mastering Tower Defense Mechanics
Dive into the thrilling world of Kingshot, a multiplayer strategy game that masterfully combines precision shooting with tactical warfare. Set against the backdrop of a medieval fantasy realm, you step into the shoes of a powerful monarch, locked in a fierce struggle for supremacy over rival kingdom
04
03-05
Helldivers 2: Superstore Rotation (All Armor & Items)
Helldivers 2 Superstore: A Complete Guide to Armor and Item Rotations
Equipping the right armor is crucial in Helldivers 2. With diverse armor types (light, medium, heavy), unique passives, and varying stats, choosing your gear is a strategic decision. The Superstore offers exclusive armor sets an
05
04-16
Azure Latch Codes (March 2025)
Last updated on March 28, 2025 - Added new Azure Latch codes!Are you looking to boost your in-game cash to splurge on animations, styles, emotes, and more in Azure Latch? Look no further. Here, you'll discover all the latest working codes for the game. Don't delay—redeem them quickly and enjoy that
Topics
More +