PSVR2 PC Connection: A Step-by-Step Guide
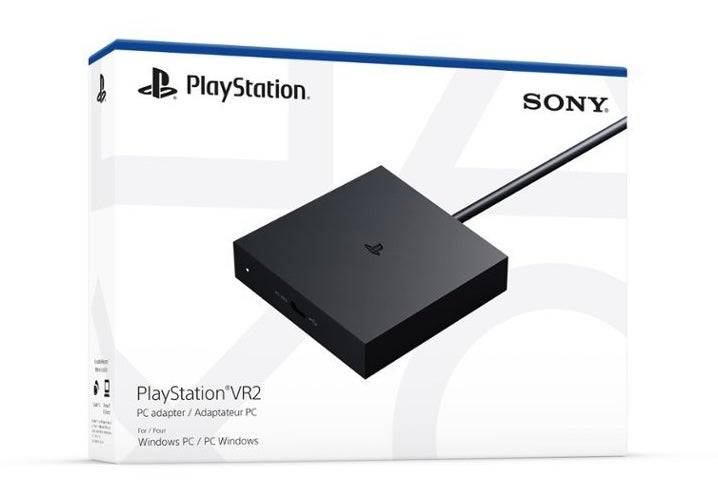
Connecting your PlayStation VR2 headset to a gaming PC for access to SteamVR's vast library has been a challenge until recently. Sony's $60 adapter, released last fall, now makes this possible for most modern PCs, provided they meet the headset's minimum specifications. However, despite its "plug-and-play" marketing, successful setup may require some extra steps depending on your PC configuration.
Connecting Your PS VR2 to Your PC Using the Adapter
Before you begin, ensure you have everything needed. The adapter enables PS VR2 compatibility with most SteamVR games, but your PC needs Bluetooth 4.0, a DisplayPort 1.4 cable, a free AC power outlet, and both the PlayStation VR2 and SteamVR apps installed on Steam. Remember, the Sense controllers charge via USB-C, so you'll need two USB-C charging ports and cables (or the optional Sony charging station).
What You'll Need

First, verify your PC's compatibility using Sony's official PS VR2 PC Adapter preparation page. If compatible, gather these items:
- PlayStation VR2 headset
- PlayStation VR2 PC adapter (includes AC adapter and USB 3.0 Type-A cable)
- DisplayPort 1.4 cable (sold separately)
- Free USB 3.0 Type-A port on your PC (Note: Sony advises against extension cables or external hubs, though a powered hub may work.)
- Bluetooth 4.0 capability (built-in or via an external adapter)
- Steam and SteamVR installed on your PC
- PlayStation VR2 app installed in Steam
Step-by-Step Connection Instructions
- Install Software: Download and install the Steam Windows client, SteamVR app, and the PlayStation VR2 app.
- Set Up Bluetooth and Pair Controllers: Enable Bluetooth in your PC's settings. On each Sense controller, press and hold the PlayStation and Create buttons until the light blinks. Pair them via your PC's Bluetooth settings. If using an external Bluetooth adapter alongside a built-in one, disable the built-in adapter in Device Manager.
- Connect the Adapter: Plug the PS VR2 adapter into a USB 3.0 Type-A port. Connect it to your GPU's DisplayPort 1.4 port using the provided cable. Connect the AC power adapter and plug it into an outlet. The adapter's indicator light will turn solid red when powered on. Connect the PS VR2 headset to the adapter's USB-C port.
- (Optional) Disable Hardware-accelerated GPU Scheduling: For newer GPUs (e.g., Nvidia RTX 40-series), disabling this setting in Windows Graphics settings may improve stability. Restart your PC after this change.
- Launch Apps and Set Up Headset: Power on the PS VR2 headset. Launch SteamVR and set it as your default OpenXR runtime. Open the PlayStation VR2 app to update controller firmware and set up your headset (Play Area, IPD, display distance, etc.). Follow on-screen instructions.
Connecting Without the Adapter?
Currently, connecting the PS VR2 to a PC without the adapter is unreliable. While some reports suggest it might be possible with specific older GPUs (around 2018) featuring VirtualLink and a USB-C port, this isn't a guaranteed or officially supported method. See Road to VR for more information.


