16 Cutting-Edge Warding Strategies from Pro Players in Dota 2's Latest Patch
Author : David
Mar 21,2025
In the dynamic world of Dota 2, controlling vision remains paramount. Each patch presents new strategic opportunities, and recent innovations in warding, highlighted by Adrian's insightful YouTube video analyzing DreamLeague S25 pro play, are game-changers. PC Gamer delves into these professional ward placements, examining their strategic value and offering alternative options to enhance your gameplay.
As Dota 2 evolves, professional teams are redefining Observer ward placement. These aren't random; they're precisely calculated positions maximizing utility while minimizing detection. Below are 16 groundbreaking ward placements used by top players, with analysis and alternative suggestions.
Table of Contents
- Mid Lane Jungle Extension
- Radiant Ancient Riverbank
- Dire Top Tier 2 Bushes
- Radiant Bottom Secret Shop Monitor
- Dire Bottom Tier 2 Fog Corner
- Radiant Roshan Pit Entrance
- Dire Mid Lane High Ground
- Radiant Top Tier 2 Backdoor Path
- Dire Bottom Ancient River Bend
- Radiant Mid Lane Jungle Passage
- Dire Top Secret Shop Approach
- Radiant Bottom Tier 3 Side Path
- Dire Roshan Pit Exit
- Radiant Top Ancient Cliffside
- Dire Mid Lane Jungle Overlook
- Radiant Bottom Tier 2 Rear Flank
Mid Lane Jungle Extension
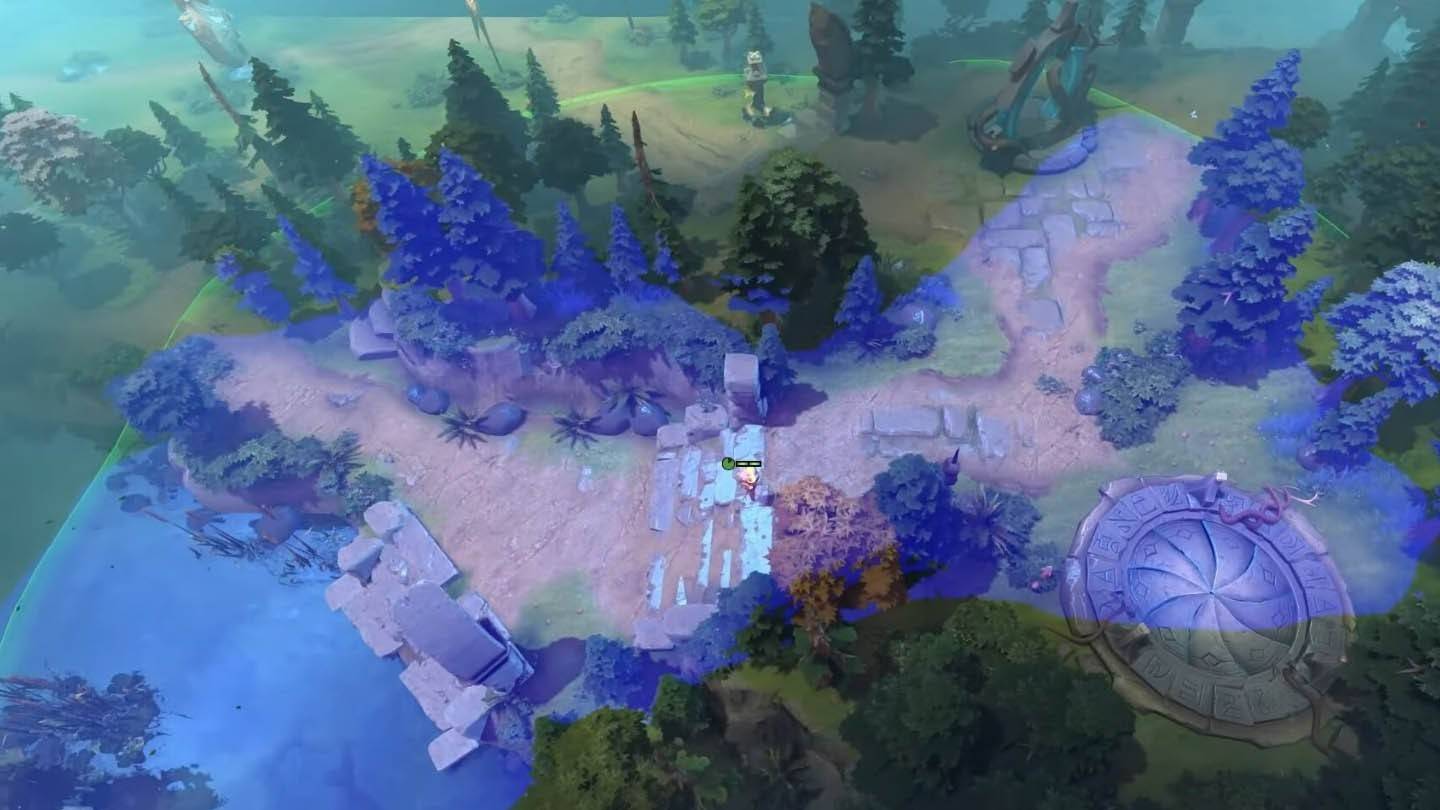 Image: ensigame.com
Early Game Domination: Positioned slightly deeper than traditional mid lane jungle wards, this provides superior vision over key early-game areas. It secures runes and reveals enemy jungle movements. Alternative: Shifting slightly Radiant-side increases secret shop approach coverage.
Radiant Ancient Riverbank
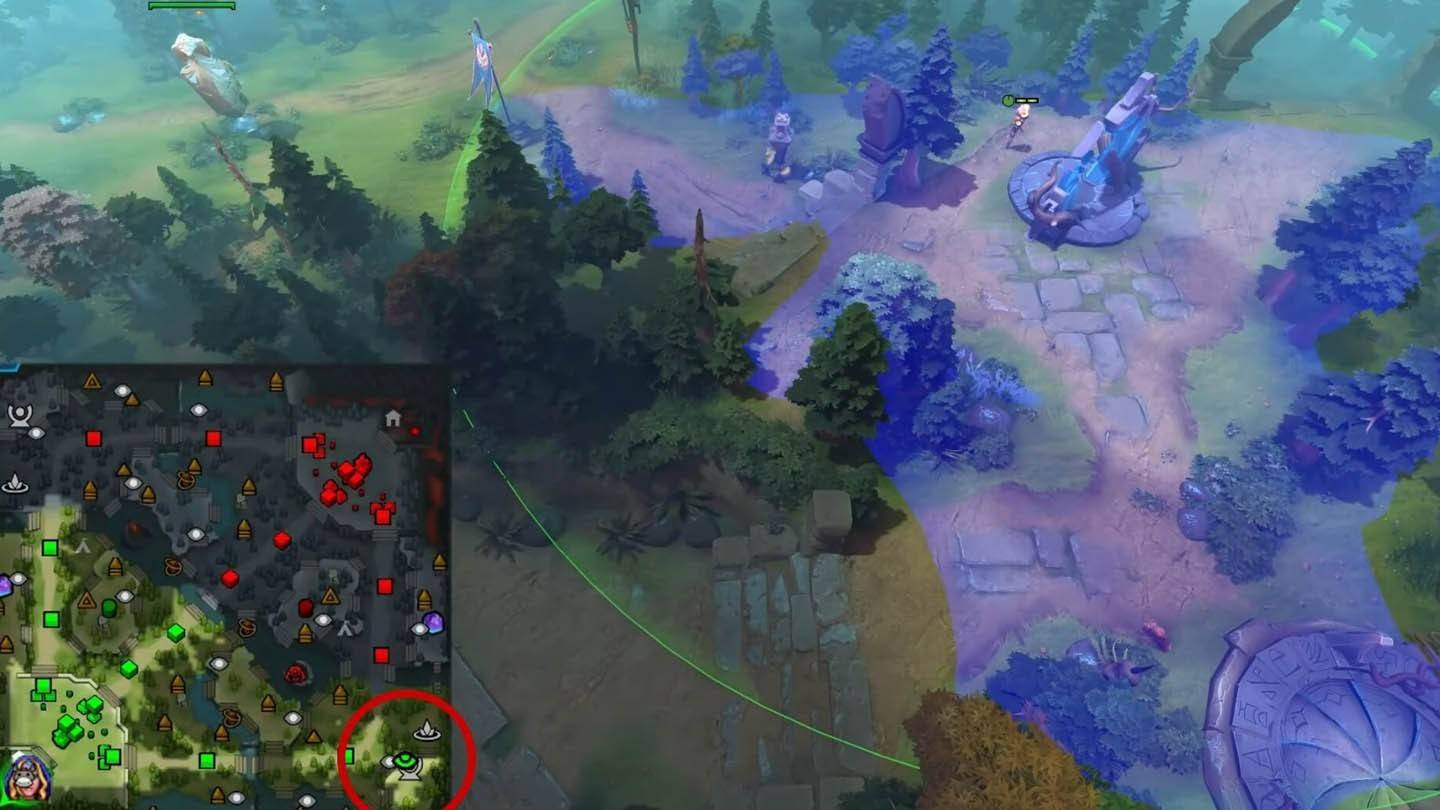 Image: ensigame.com
Strategic Depth: This ward provides deep vision into the Radiant base from an unexpected angle. Its unusual placement makes it harder to spot, ensuring longevity. Bonus Tip: Combine with a nearby Sentry ward for enhanced defense.
Dire Top Tier 2 Bushes
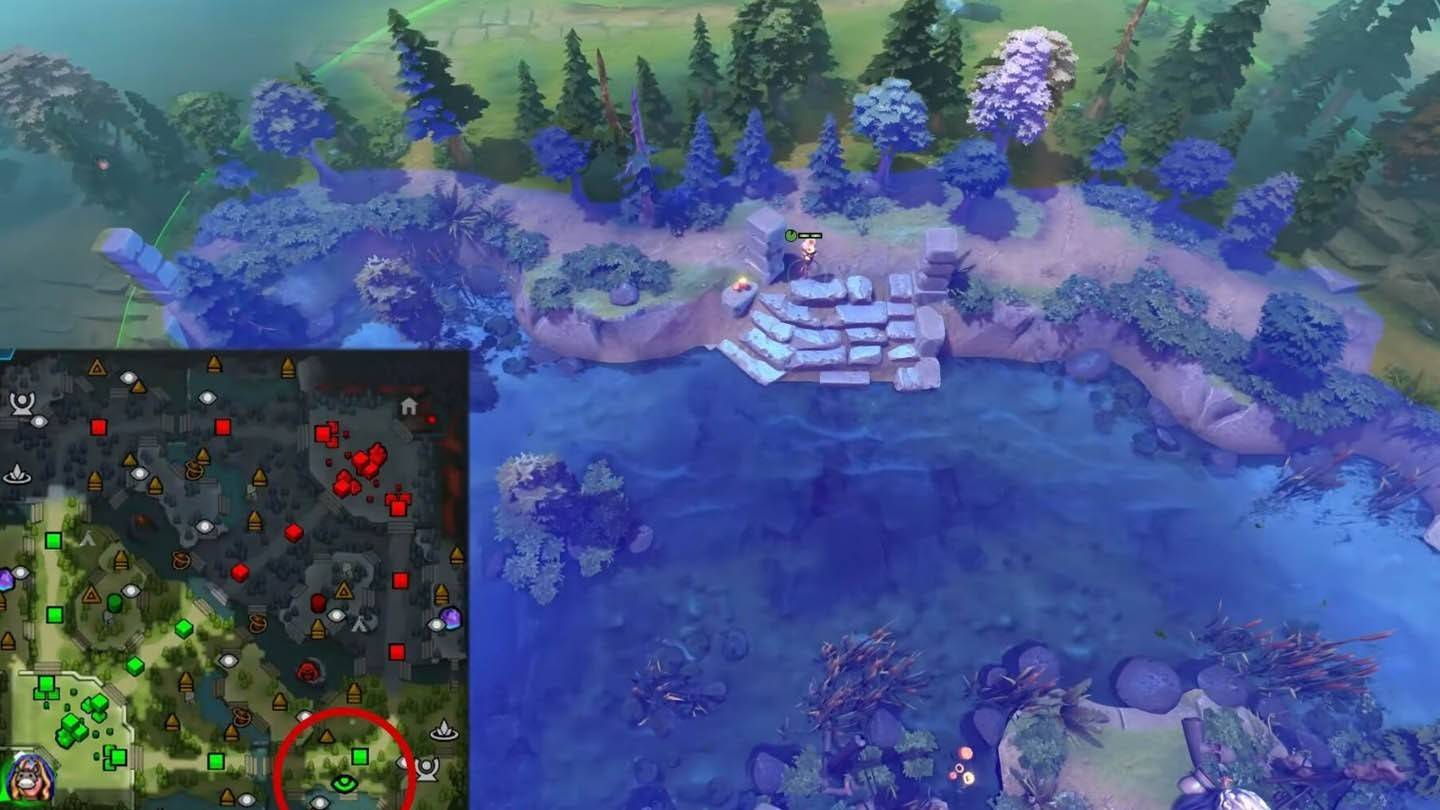 Image: ensigame.com
Tower Protection: Revealing key areas around Dire's Tier 2 towers aids defense and offense, especially during teamfights. Pro Tip: Rotate this ward to avoid predictability.
Radiant Bottom Secret Shop Monitor
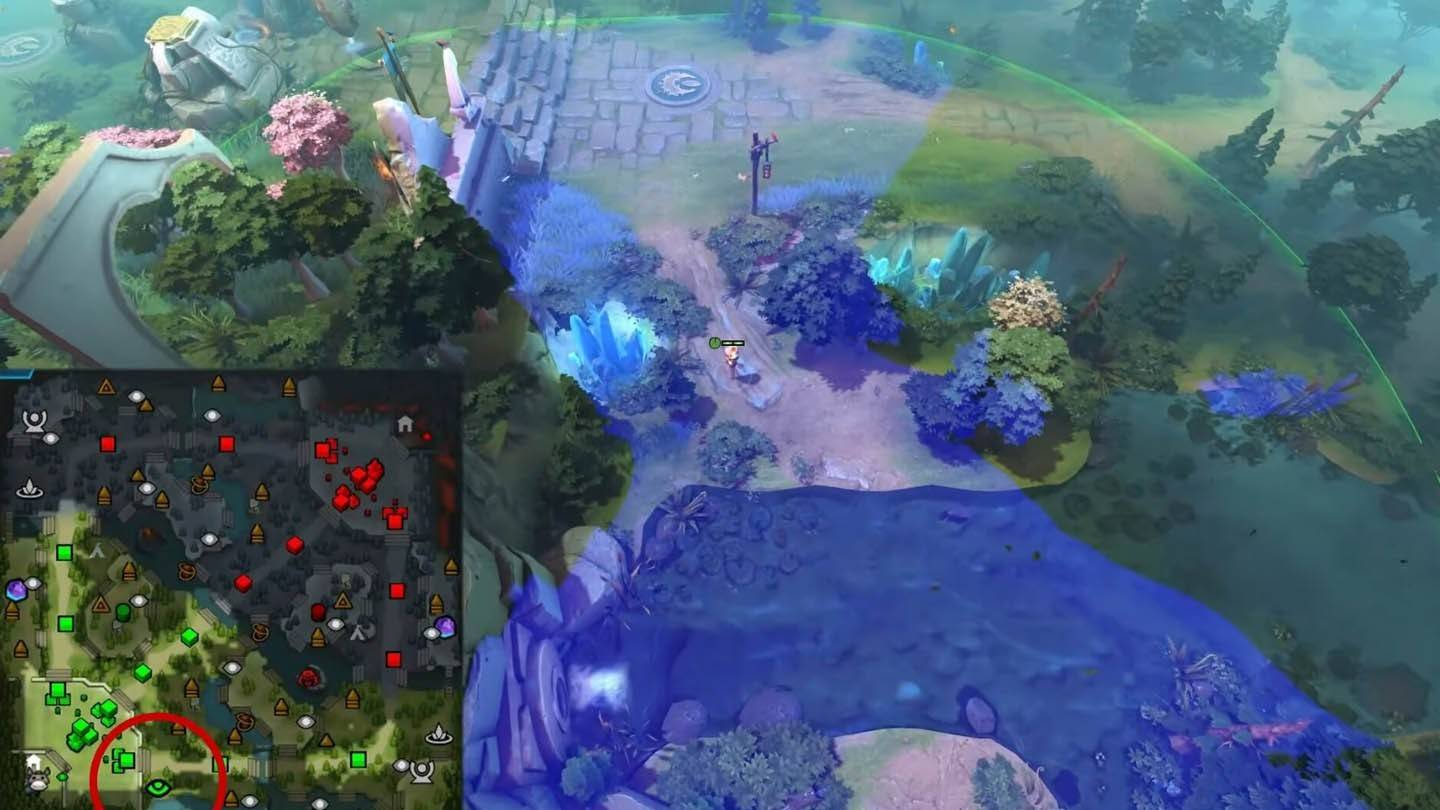 Image: ensigame.com
Economic Intelligence: Monitor enemy shop activity, gaining insights into item purchases and timing. Advanced Strategy: Combine with vision denial wards to disrupt buybacks.
Dire Bottom Tier 2 Fog Corner
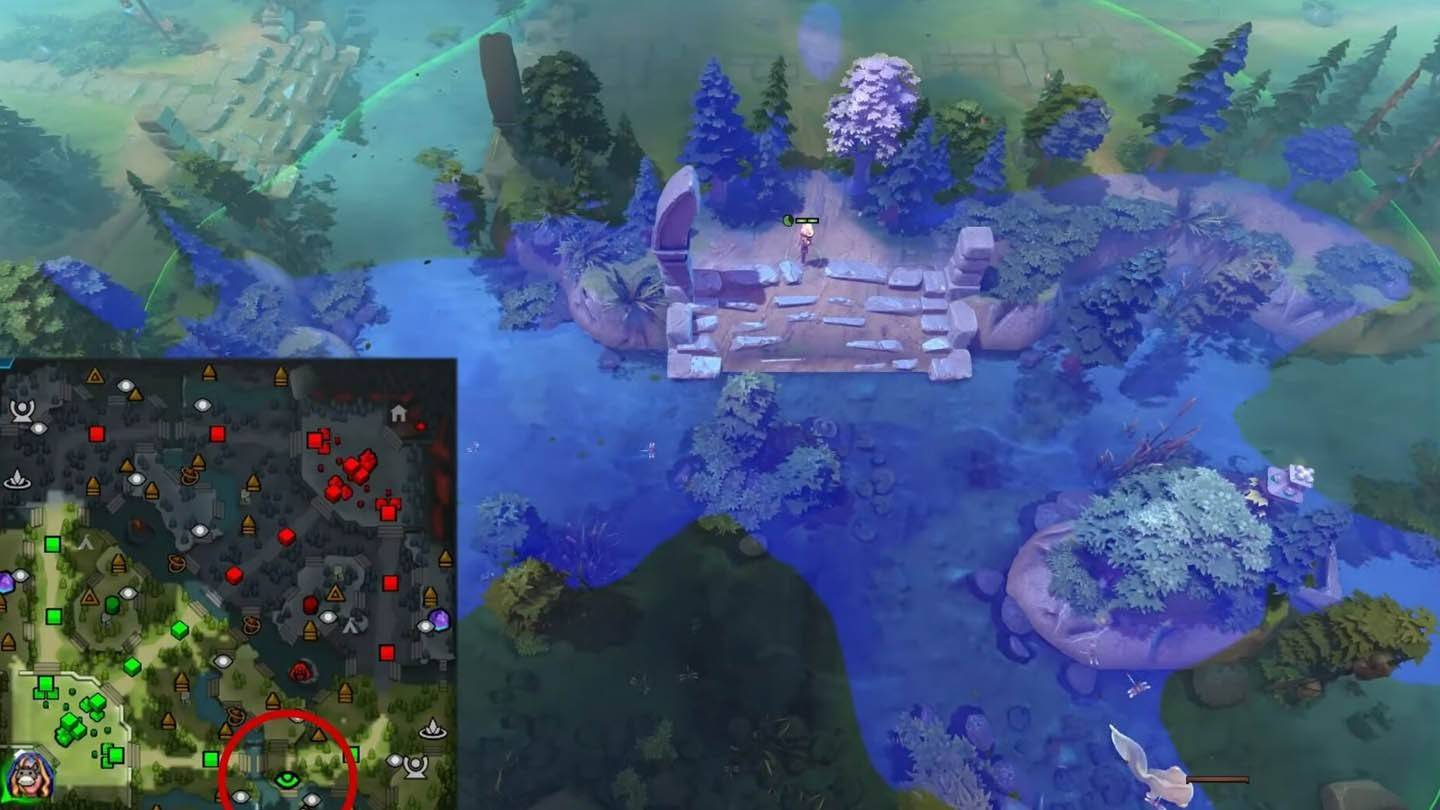 Image: ensigame.com
Ambush Preparation: This ward provides vision into foggy areas near the Dire's bottom Tier 2 tower, ideal for ganks and ambushes. Expert Advice: Use with smoke for surprise attacks.
Radiant Roshan Pit Entrance
 Image: ensigame.com
Timing is Everything: Early detection of Roshan attempts allows for timely responses and counter-attacks. Tactical Insight: Frequent rotation maintains surprise.
Dire Mid Lane High Ground
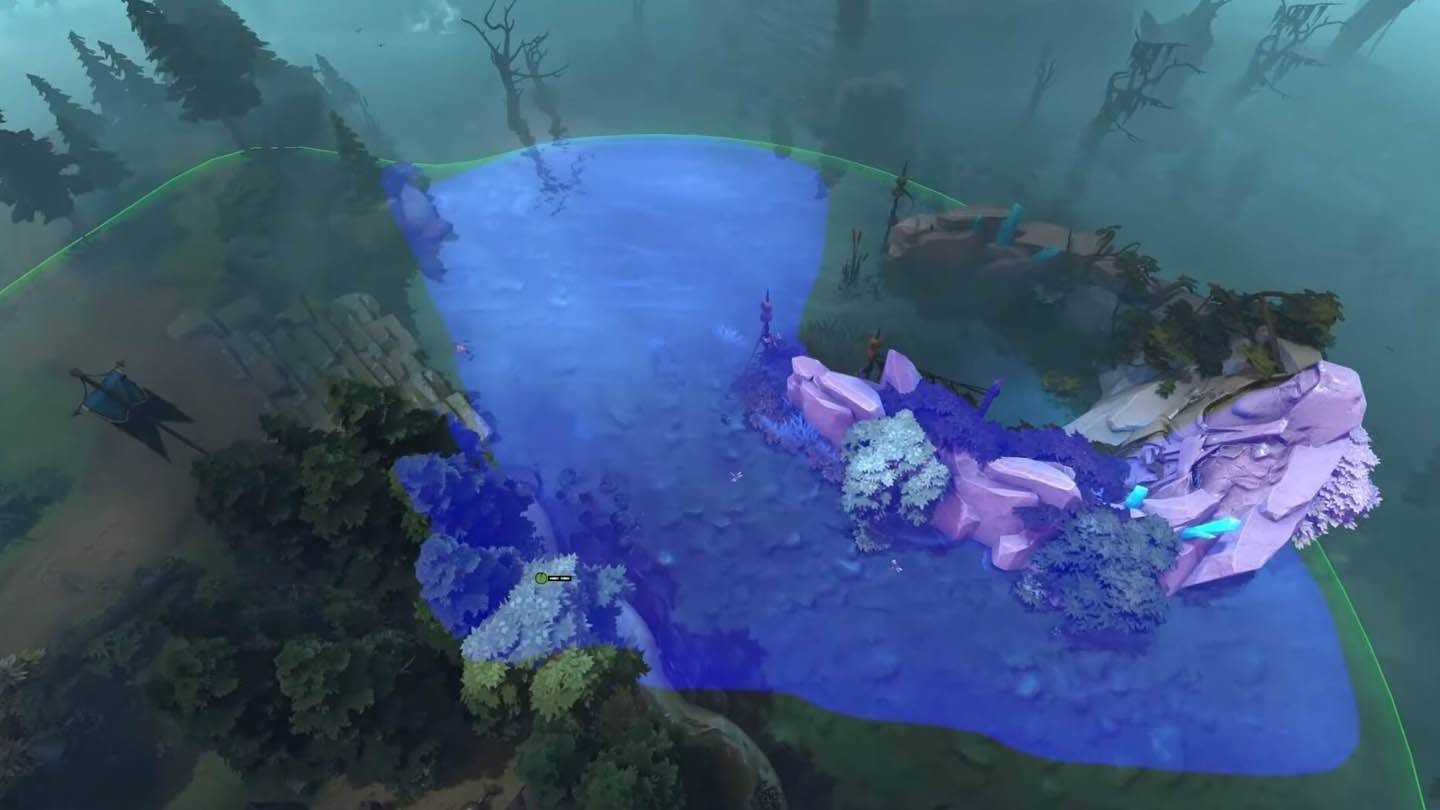 Image: ensigame.com
Elevated Awareness: Extended vision along the mid lane high ground improves awareness of approaching enemies. Strategic Note: Ideal for mid lane control during critical moments.
Radiant Top Tier 2 Backdoor Path
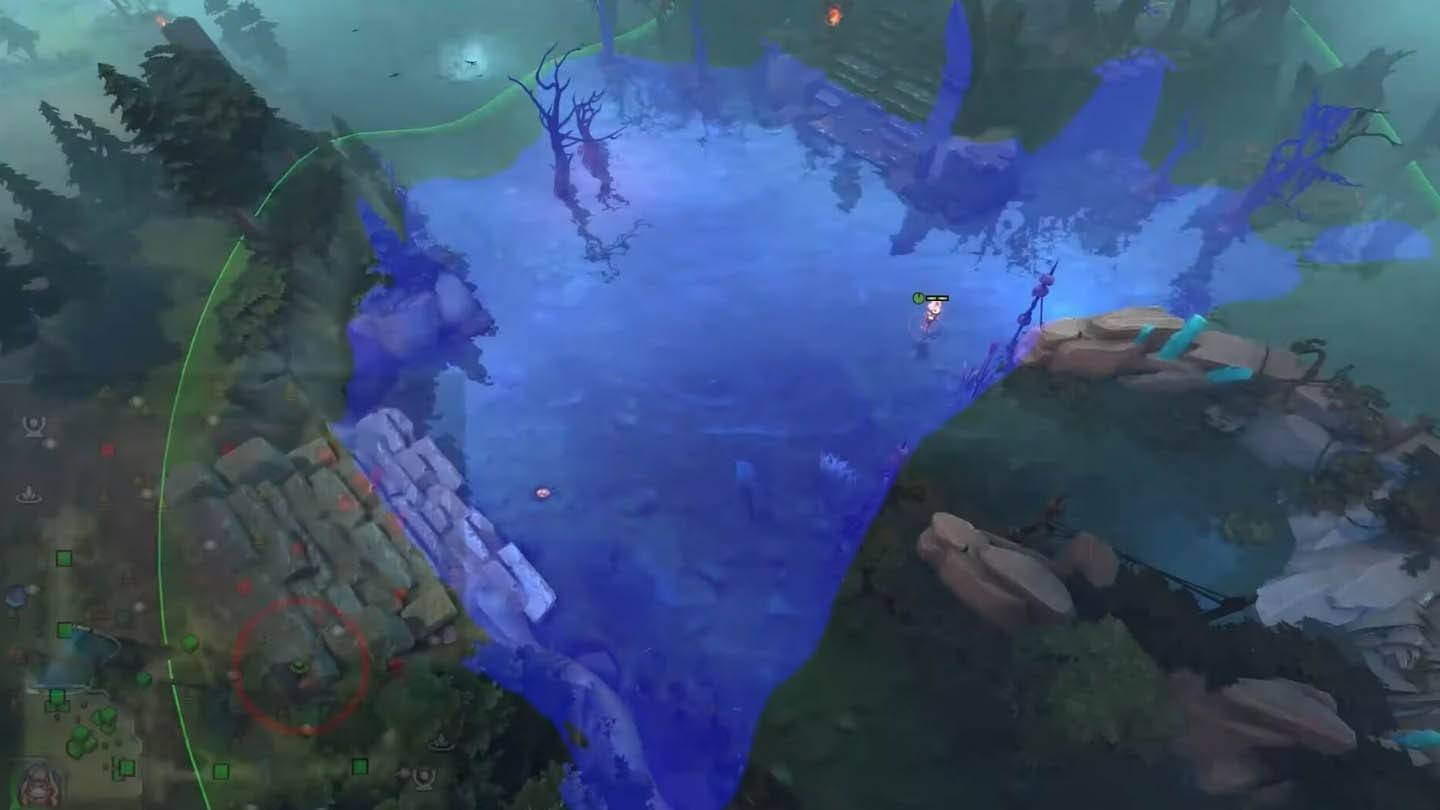 Image: ensigame.com
Security First: Monitors backdoor paths to the Radiant's top Tier 2 tower, preventing surprise attacks. Defensive Tip: Place a Sentry ward nearby to catch invisible heroes.
Dire Bottom Ancient River Bend
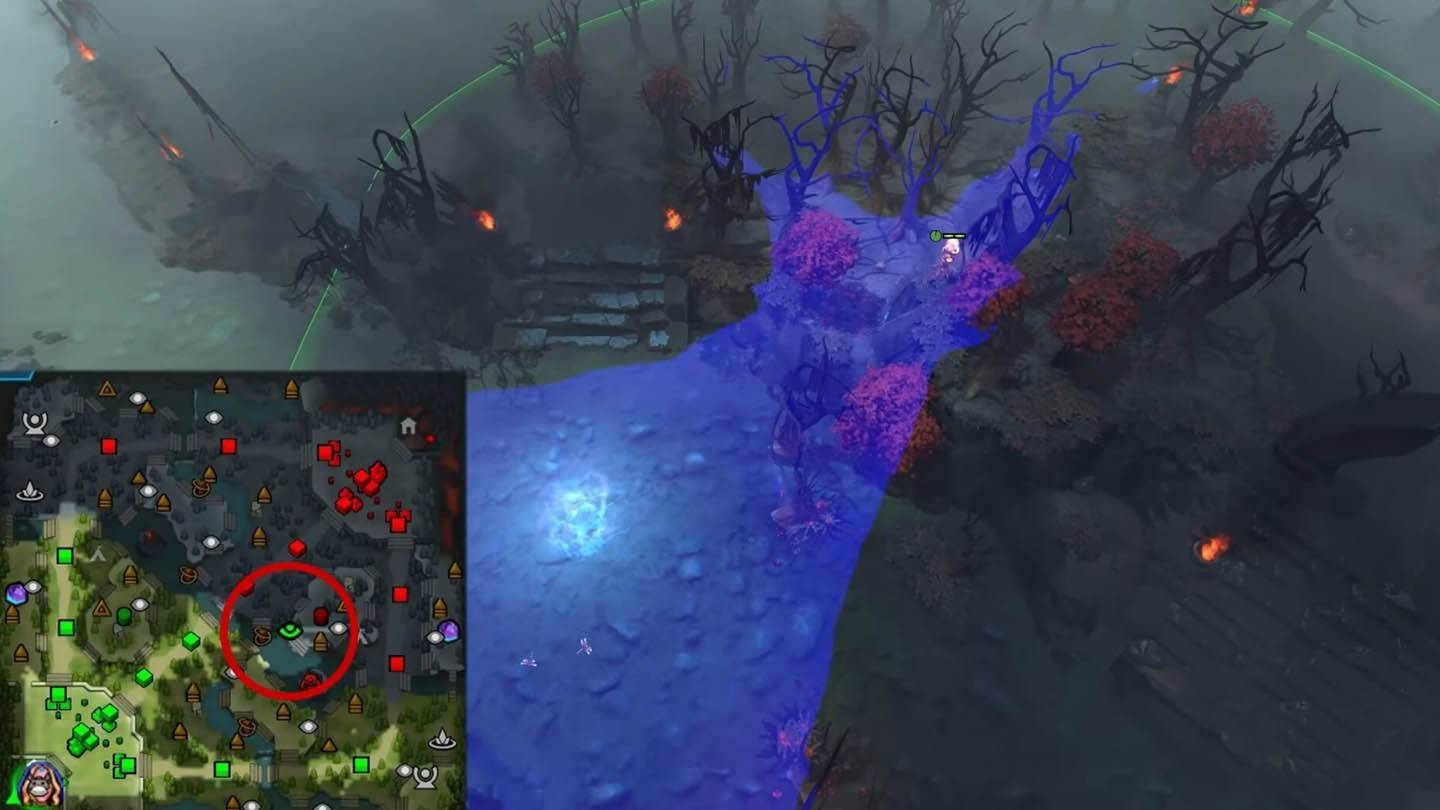 Image: ensigame.com
Deep Vision Mastery: Deep vision into the Dire base via an unconventional river bend showcases creative warding. Advanced Placement: Experiment for optimal coverage.
Radiant Mid Lane Jungle Passage
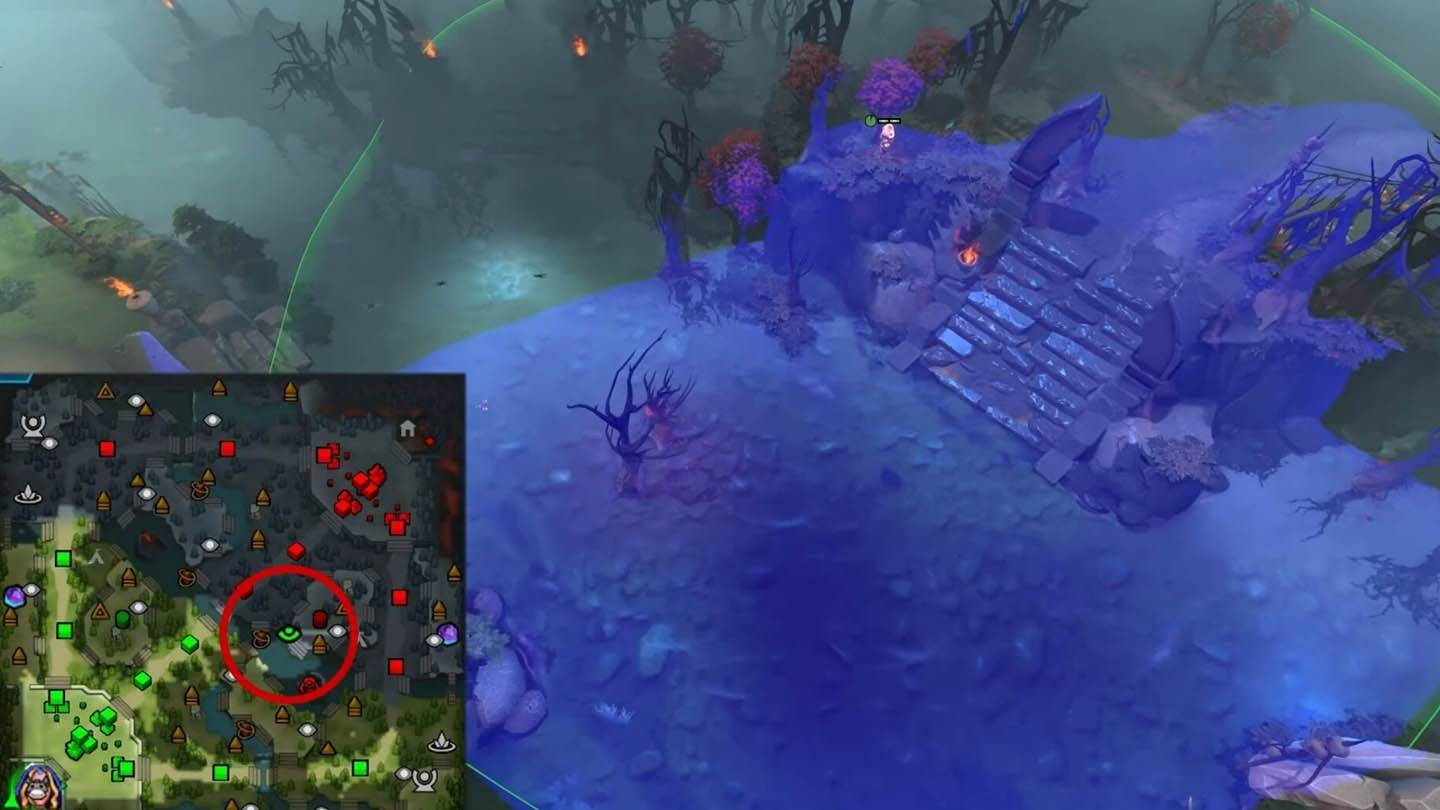 Image: ensigame.com
Comprehensive Coverage: Reveals key jungle passages near the mid lane, enhancing map awareness. Professional Recommendation: Rotate between jungle entrances.
Dire Top Secret Shop Approach
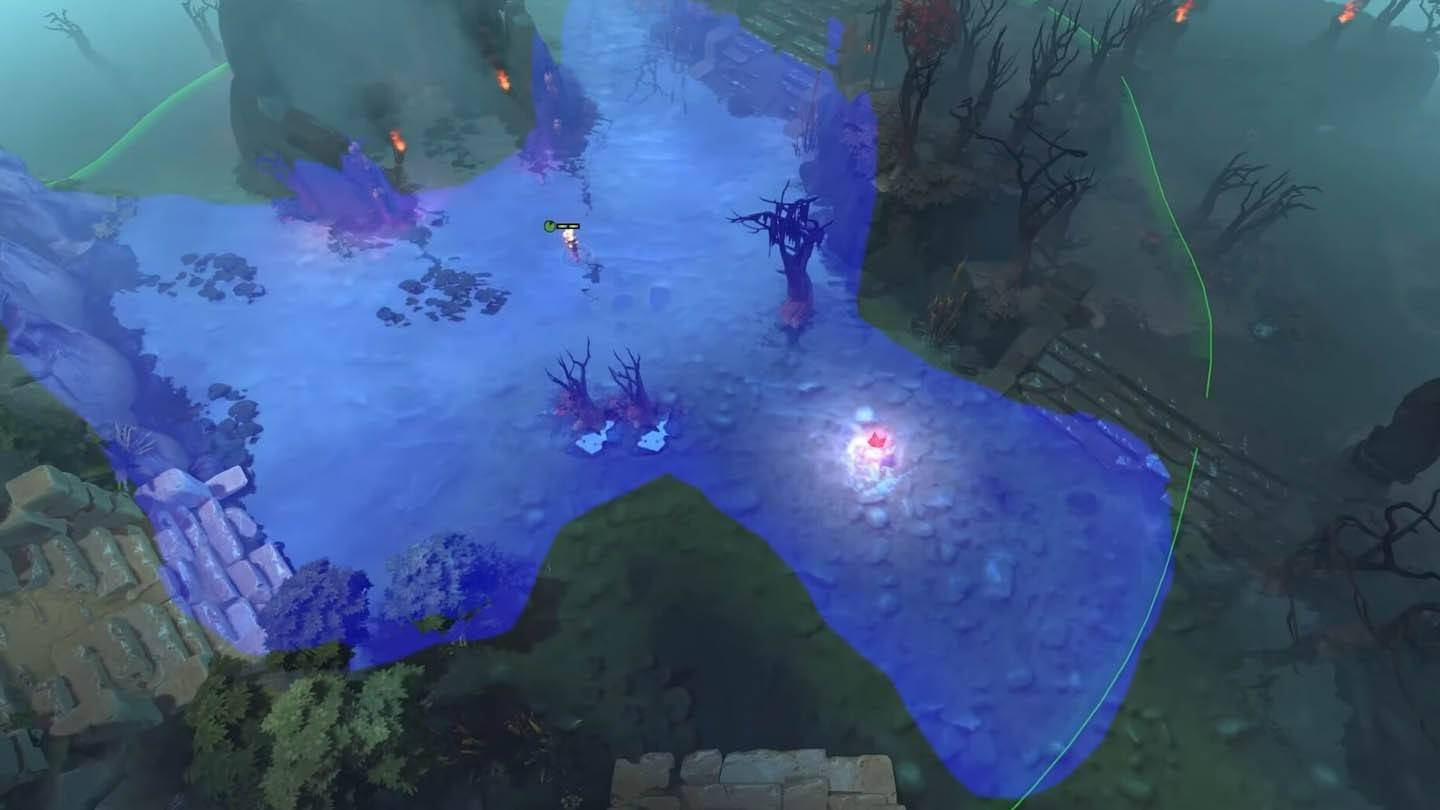 Image: ensigame.com
Economic Surveillance: Alerts when enemies approach or leave the Dire's secret shop, offering economic intelligence. Competitive Edge: Time pushes effectively.
Radiant Bottom Tier 3 Side Path
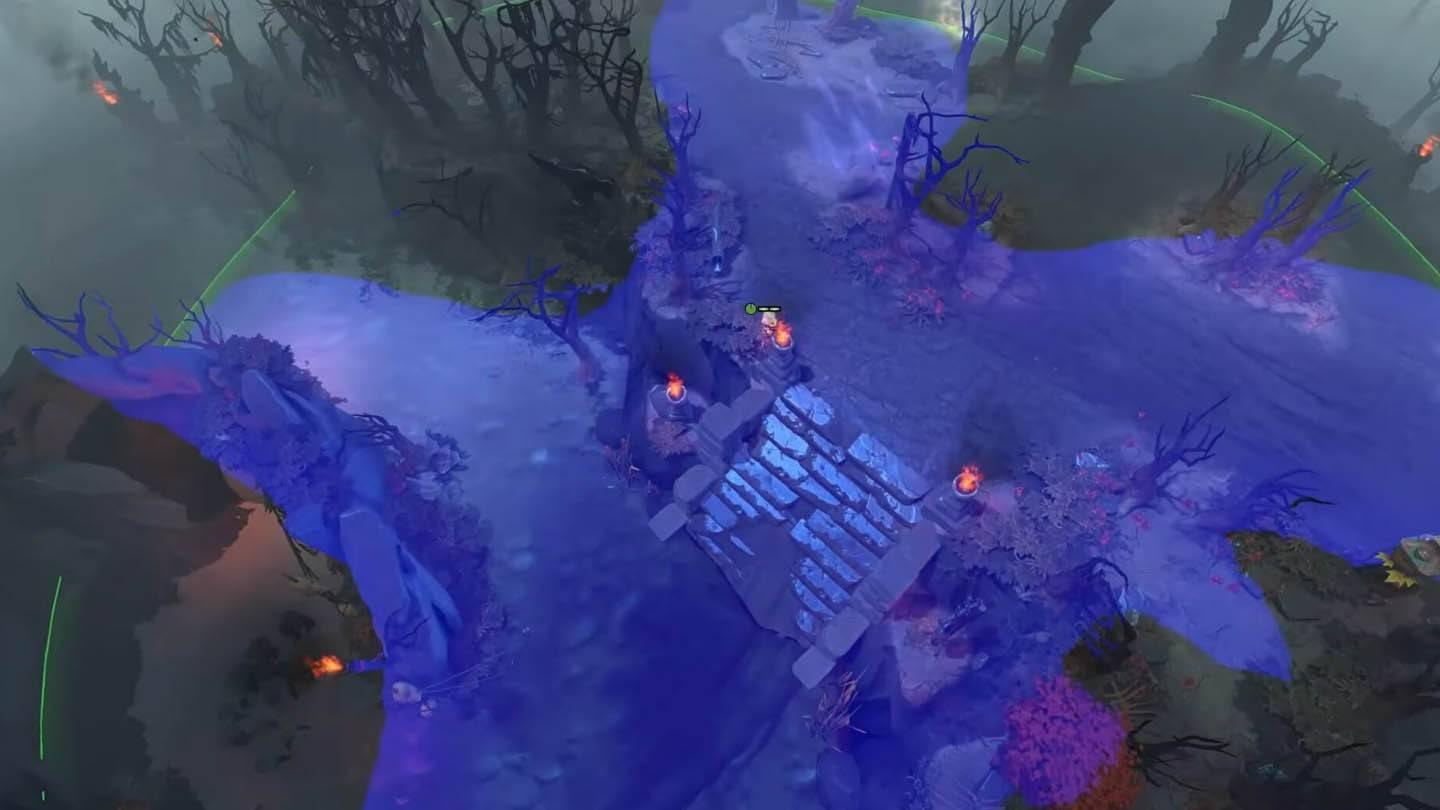 Image: ensigame.com
Flank Detection: Monitors side paths to the Radiant's bottom Tier 3 tower, warning against flanks. Team Coordination: Share this vision for coordinated responses.
Dire Roshan Pit Exit
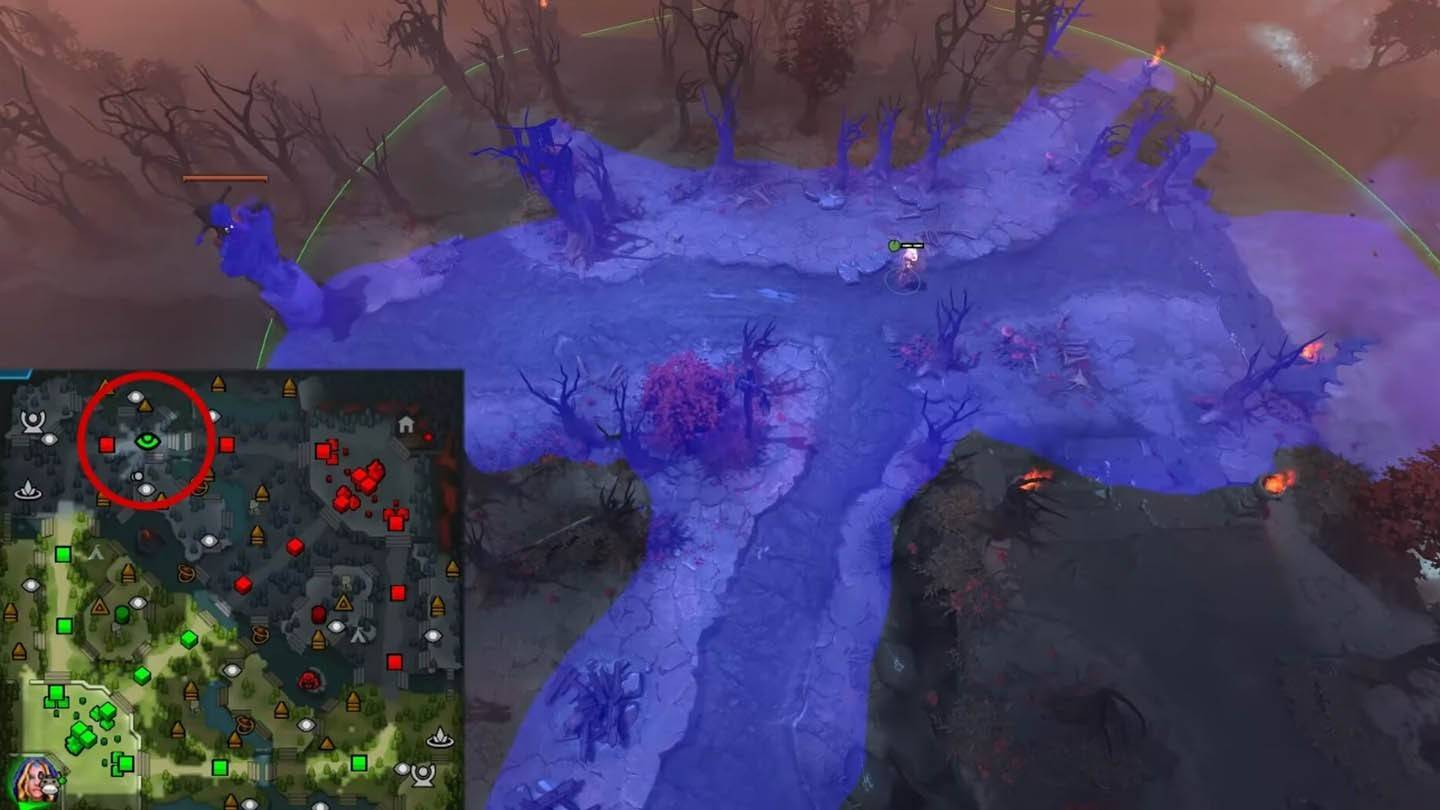 Image: ensigame.com
Counterplay Opportunity: Detects enemy movements exiting the Roshan pit from the Dire side, enabling timely reactions. Strategic Positioning: Essential during late-game Roshan battles.
Radiant Top Ancient Cliffside
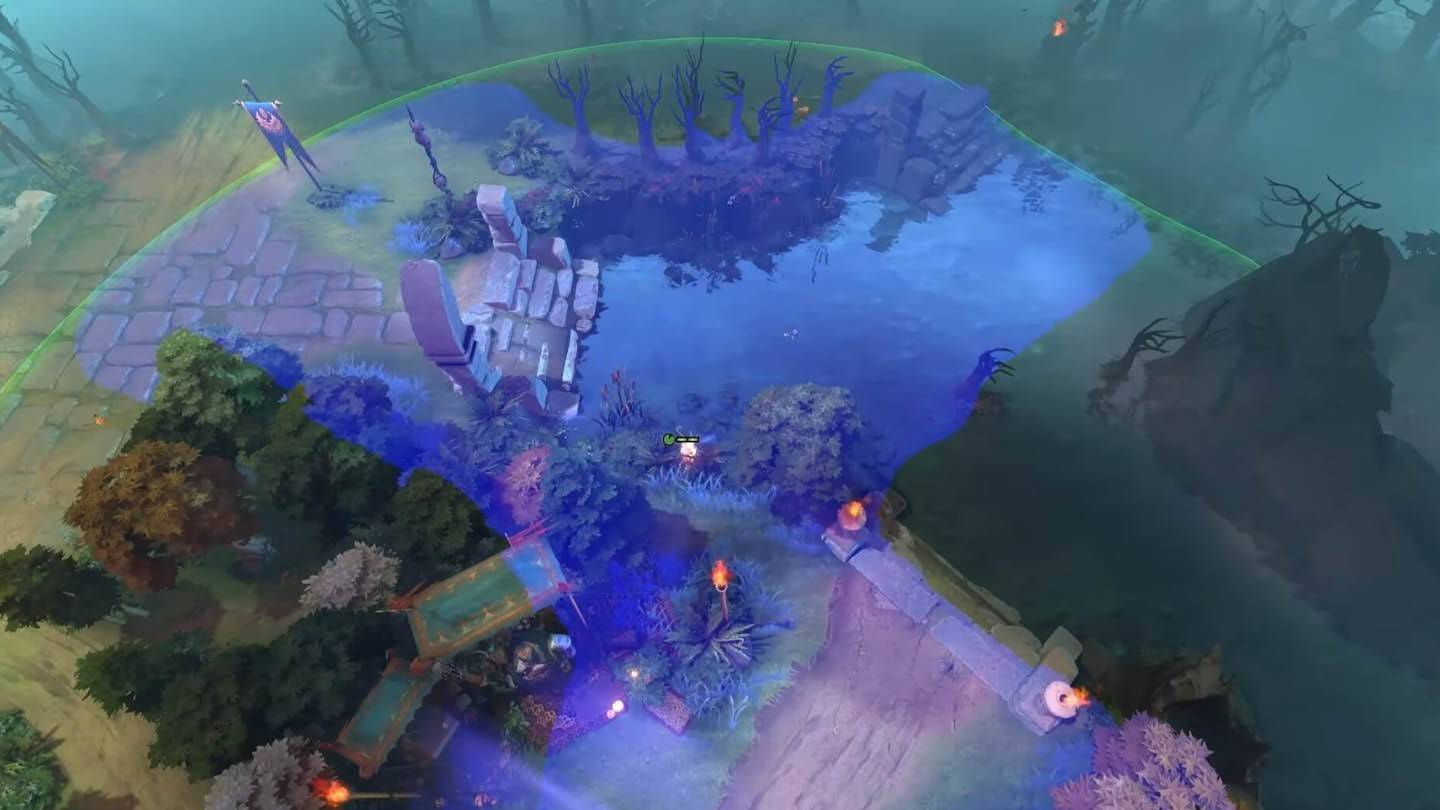 Image: ensigame.com
Hidden Vantage Point: Offers hidden vision into the Radiant base from a cliffside, surprising opponents. Elite Placement: Requires precise execution.
Dire Mid Lane Jungle Overlook
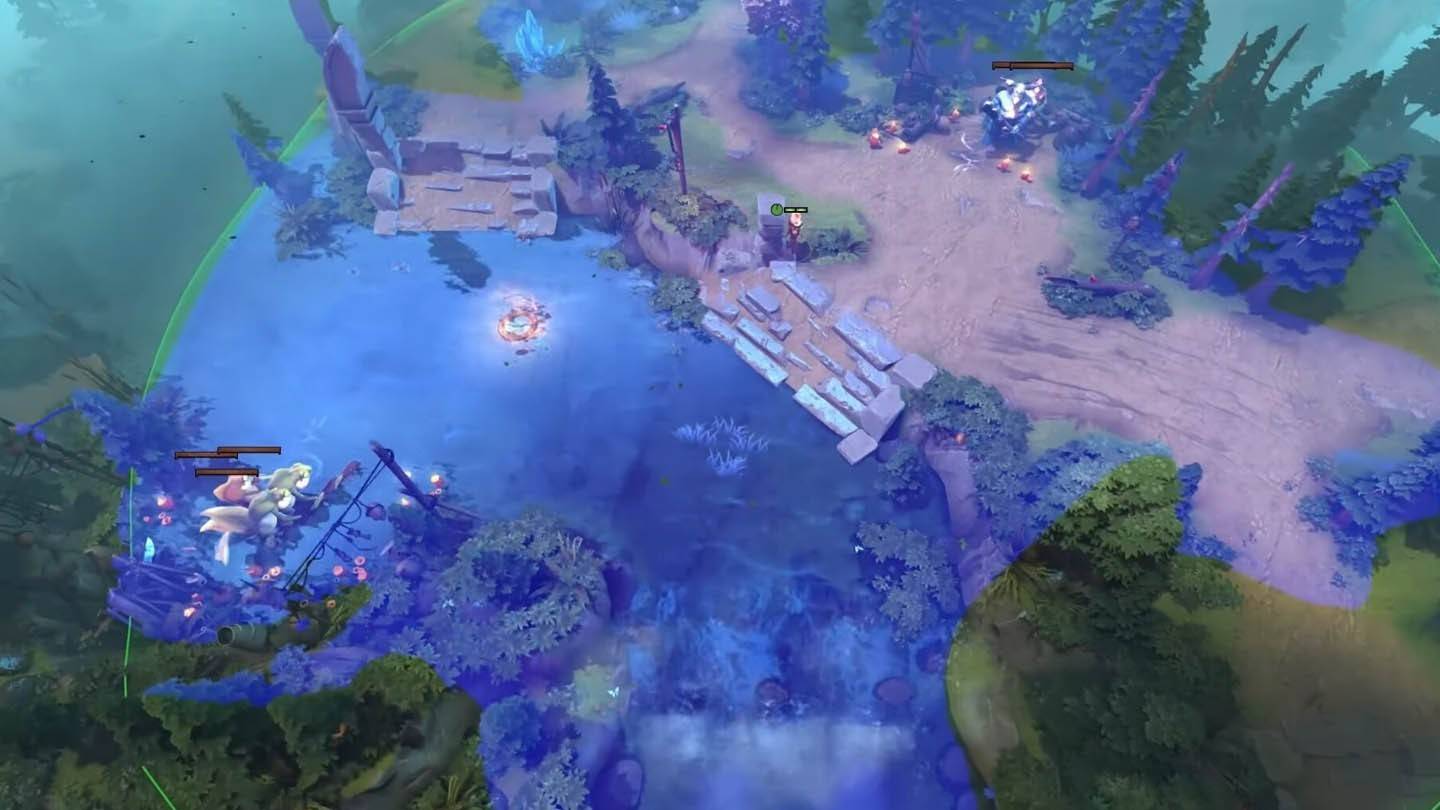 Image: ensigame.com
Elevated Advantage: Provides elevated vision over the Dire's mid lane jungle, improving situational awareness. Advanced Technique: Combine with other mid lane wards for comprehensive coverage.
Radiant Bottom Tier 2 Rear Flank
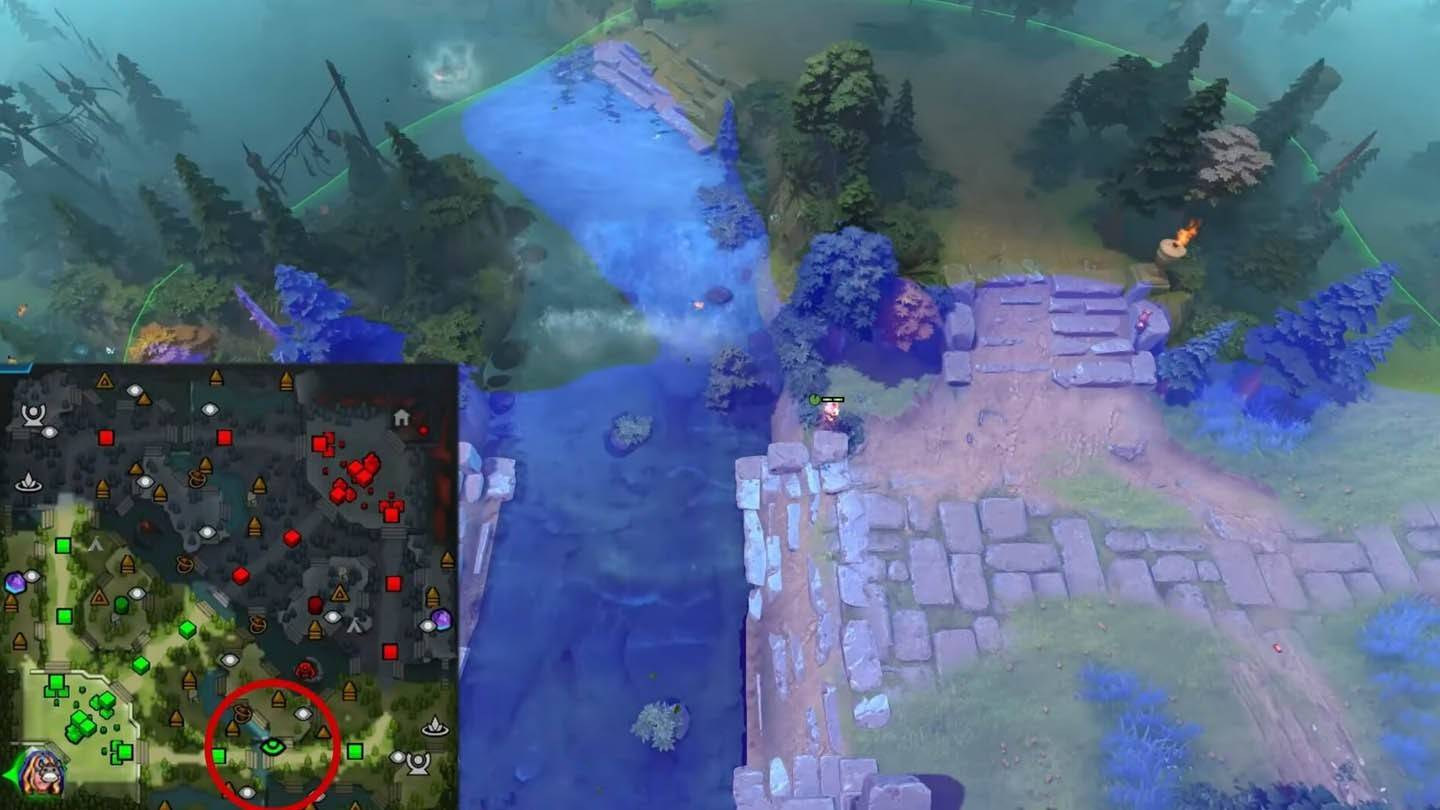 Image: ensigame.com
Preventive Measures: Monitors rear flanks near the Radiant's bottom Tier 2 tower, preventing sneak attacks. Defensive Mastery: Critical for tower integrity.
These advanced ward placements represent peak professional vision control in Dota 2. By studying and implementing these strategies, you'll gain a significant advantage. Effective warding goes beyond placement; it's about understanding map control and adapting to dynamic situations.
Latest Articles

Woochi the Wayfarer Preorder and DLC
Woochi the Wayfarer takes place in a fantasy reimagining of Korea’s Joseon era. Discover how to pre-order the game, its pricing, and whether any special editions or downloadable content are planned.
← Return to Woochi the Wayfarer main articleWoochi

"New Auto-Chess Game Launches on Android with Unique Heroes"
King Chipmunk has truly embraced chaos, declaring all-out war! Claws and Chaos plunges players into a dystopian world where animals battle against impossible odds for their shot at salvation. This auto-chess strategy game comes from Mad Mushroom Medi
Gameplay of EA's New The Sims 'Concept' Appears to Leak Online, and It's Not Going Down Well With Fans
A video allegedly showing the next iteration of The Sims has surfaced online, sparking concern among fans about what it could mean for the beloved franchise.
Project Rene — a codename sometimes used interchangeably with The Sims 5, though EA insists

Wuthering Waves Debuts 5-Star Heroes in Update 2.1
Key Points SummaryPhoebe and Brant have been officially confirmed as the upcoming 5-Star Rinascita characters in Wuthering Waves Version 2.1.Lore and in-game appearances suggest Phoebe is likely a Spectro unit, while Brant is expected to wield a swor
Invincible Cast at IGN Live 2025: Killer Instinct, Authenticity, 3v3 Tag
One of the major announcements from the Xbox Showcase was the reveal of 'Invincible VS,' and we sat down with Skybound's Quarter Up studio team at IGN Live to discuss why this 3v3 tag fighter is the perfect adaptation for Robert Kirkman's superhero s
Matchcreek Motors Crafts Custom Cars Using Match-3 Gameplay
After developing multiple popular mobile racing games, Hutch Games is back with a unique twist. This time, they're introducing a puzzle element. Fear not, racing enthusiasts—they haven't strayed far from their roots. Automobiles and racing remain at
Latest Games

E36 M3 Drift & Park Simulator
Racing丨298.7 MB

Offline Games No WiFi Puzzles
Puzzle丨125.20M

Girl Wars
Role Playing丨1.1 GB

Pool Billiards Pro
Sports丨10.9 MB

Huyền Thoại Làng Lá
Strategy丨910.9 MB

Word Game. Crossword Search Pu
Word丨42.4 MB

Antistress: Relaxing Toy Games
Simulation丨173.6 MB

Trending Games
MORE +


Top News
MORE +


01
01-01
Call of Duty: Black Ops 6 Adds Fan-Favorite Modes
Call of Duty: Black Ops 6 receives classic game modes and map updates this week, addressing post-launch issues. The highly anticipated "Infected" mode arrives tomorrow, followed by the iconic "Nuketown" map on Friday, November 1st.
Infected and Nuketown Enhance Black Ops 6
Treyarch, the developer,
02
03-13
Top 10 LitRPG Books for 2025
Reading is my absolute favorite pastime. While I enjoy video games and TV, nothing quite compares to immersing myself in a captivating book series. My reading journey began with Harry Potter, branching out to sci-fi, fantasy, mysteries, and even some non-fiction. But my true literary passion ignite
03
04-08
Kingshot Beginner's Guide: Mastering Tower Defense Mechanics
Dive into the thrilling world of Kingshot, a multiplayer strategy game that masterfully combines precision shooting with tactical warfare. Set against the backdrop of a medieval fantasy realm, you step into the shoes of a powerful monarch, locked in a fierce struggle for supremacy over rival kingdom
04
03-05
Helldivers 2: Superstore Rotation (All Armor & Items)
Helldivers 2 Superstore: A Complete Guide to Armor and Item Rotations
Equipping the right armor is crucial in Helldivers 2. With diverse armor types (light, medium, heavy), unique passives, and varying stats, choosing your gear is a strategic decision. The Superstore offers exclusive armor sets an
05
04-16
Azure Latch Codes (March 2025)
Last updated on March 28, 2025 - Added new Azure Latch codes!Are you looking to boost your in-game cash to splurge on animations, styles, emotes, and more in Azure Latch? Look no further. Here, you'll discover all the latest working codes for the game. Don't delay—redeem them quickly and enjoy that
Topics
More +